Home > Fireplace Blog > Gas Fireplace Wall Switch Guide
If you own a Valor gas fireplace equipped with the GV60 valve system, this gas fireplace wall switch guide is for you. This guide introduces Valor’s gas fireplace wall switch kits (1265WSK and the RBWSK). Next, we will walk you through understanding the basic functions and delve into the installation process. Whether you are a newcomer or an expert in fireplaces, rest assured that this guide has you covered. Moreover, we have also provided the PDF versions so that you can download and save a copy.
Install Wall Switch Kit (recommended)
The wall switch is connected to the receiver in the fireplace. Before proceeding, note that you must complete the installation of the wall switch, connect the battery holder, and test the wall switch before synching the handset to the receiver. We highly recommend your authorized Valor dealer complete the installation of wall switches or other accessories to ensure a true Valor experience. For more details, see your fireplace's installation instructions.
Installation & Operation Manual:
Mastering the 1265WSK Wall Switch
About the 1265WSK Gas Fireplace Wall Switch
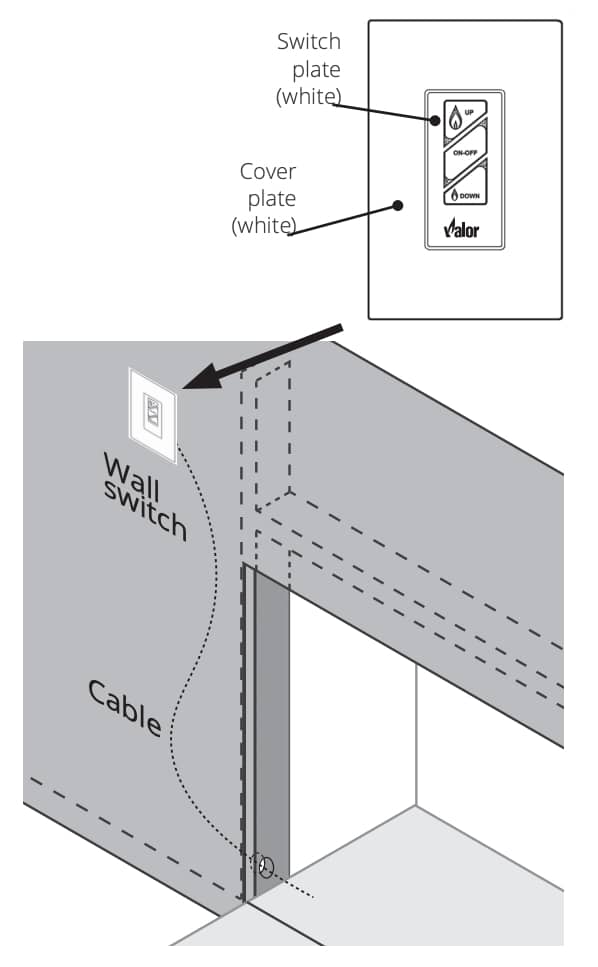
The Wall Switch Kit (1265WSK) can be installed to operate the fireplace. The kit includes the switch plate and cover plate (available in white only) and a 26-foot (8 m) long wiring harness. The wall switch allows the user to light and turn the flame up or down.
The thermostat and programmable features are available through the remote control. Furthermore, the wall switch can be used in conjunction with the thermostatic remote control. All wiring associated with this kit is low voltage (6 volts). However, special considerations are required if changing this switch with other switches of different voltages. Therefore, it's advisable to consult your electrician.
Using the 1265WSK Wall Switch
The wall switch can be used to control your fireplace. For instance, you can turn the fireplace on or off, and you can increase or decrease the flame height.
It is important to note that the thermostat and programming functions are not available with the wall switch and are only available through the remote control.
Step-by-Step Installation - 1265WSK Wall Switch

- If connected, disconnect the battery holder from the receiver.
- Decide where the switch is to be installed in the wall. Install an electrical outlet box or mud ring as required (not supplied).
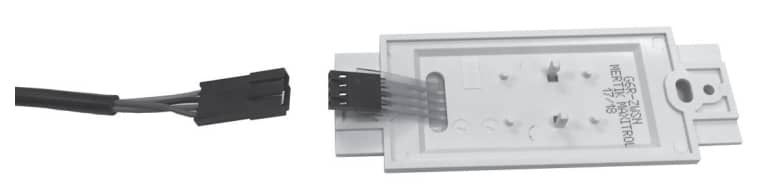
- Thread the switch wire through an access hole in the appliance toward the outlet box. The brown end stays in the engine, the black end goes out to the wall switch.
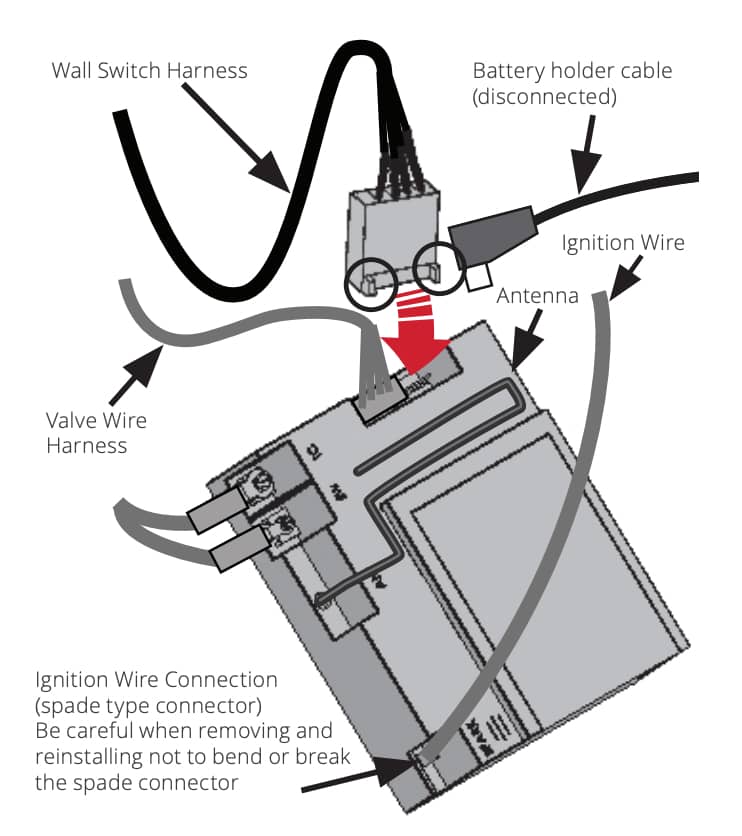
- Pull out the receiver. You can remove the ignition wire to improve access to the receiver.
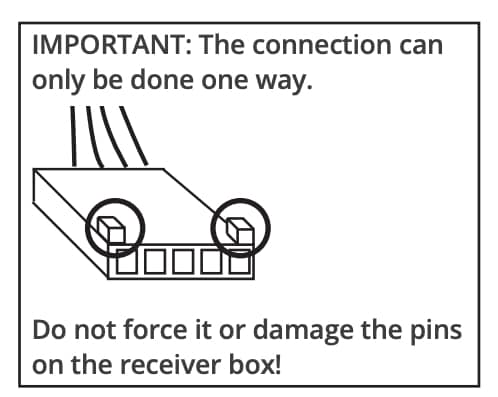
- Take the switch wire and plug the brown connector into the receiver’s connection slot as indicated (the other slot should already be fitted with the valve’s wire harness connector). IMPORTANT: The connection can only be fitted one way. Do not force it or damage the pins!
- On the outside of the fireplace, run the switch wire into the outlet box. Use insulated type staples to secure the wiring to the frame.
- Plug the black end of the wire into the switch plate connector.
- Screw the switch plate into the installed outlet box.
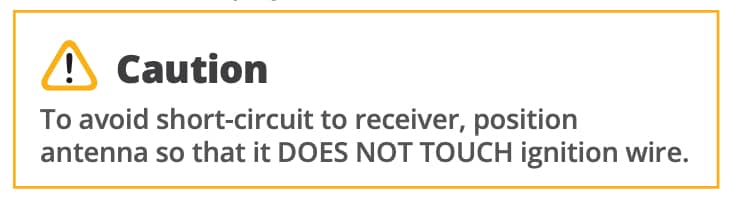
- Reconnect the ignition wire to the receiver if it was previously removed. IMPORTANT: Make sure the ignition wire DOES NOT TOUCH the receiver's antenna.
- Connect the battery holder to the receiver.
- Test the wall switch’s operation
- Once the operation is confirmed correct, fix the wall cover plate to the outlet box.
- Replace the receiver in its position, as well as the antenna if deployed.
Ensure a True Valor Experience
To ensure a qualified installation, please consult with your local authorized Valor dealer for more information.
How to operate the 1265WSK and RBWSK Wall Switches
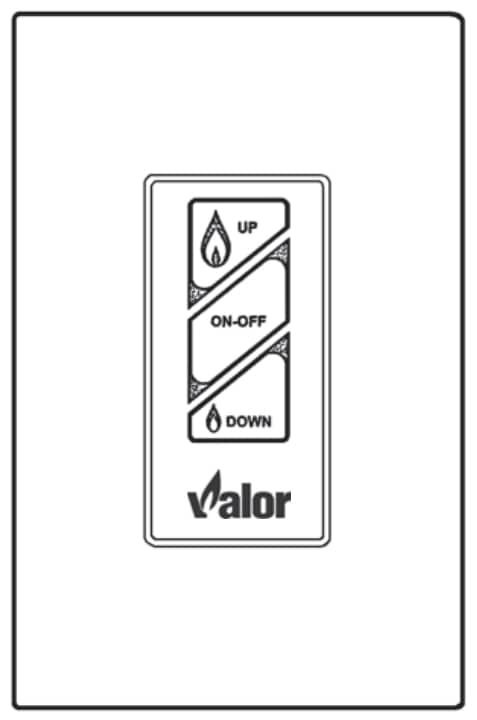
To turn the appliance ON and OFF
Press the ON-OFF button once to light the pilot. Press again to shut off the pilot.
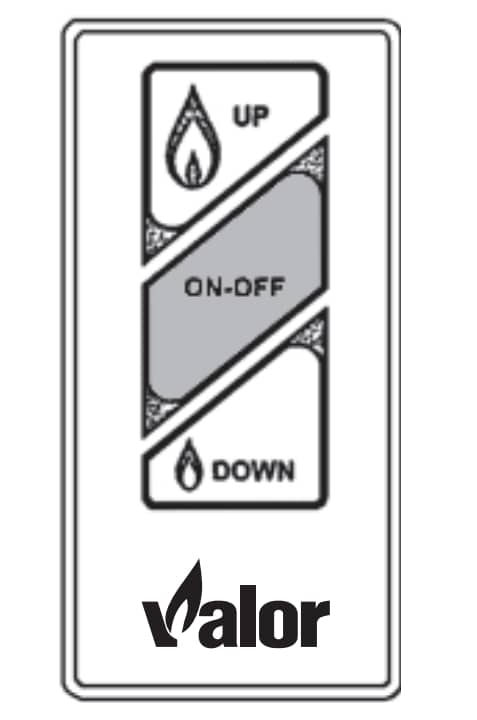
To Increase the Flame Height
Adjusting the flame height, press and hold the large flame UP button to gradually increase flame height.
.jpg)
To Decrease the Flame Height
Similarly, press and hold the small flame DOWN button to gradually decrease flame height.
.jpg)
RBWSK Gas Fireplace Wall Switch Kit Overview: The Ultimate Remote Battery and Wall Switch Kit
The RBWSK Remote Battery and Wall Switch Kit usss the GV60 control system and is available on select Valor gas fireplaces. Please refer to the manual to learn more about compatible models. If you intend to use this kit on a Valor fireplace installed outdoors, you must position and mount this assembly in a sheltered place protected from the elements (dry location). A qualified dealer, installer, or gas supplier must install or service this kit. You should use these instructions alongside the main installation instructions for the heater models listed above.
Benefits of the RBWSK Kit
The Remote Battery and Wall Switch Kit (RBWSK) enhances the accessibility of fireplace batteries. It also consolidates their location with the wall switch. The RBWSK connects the batteries to the fireplace receiver, eliminating the need for batteries in the receiver or battery box.
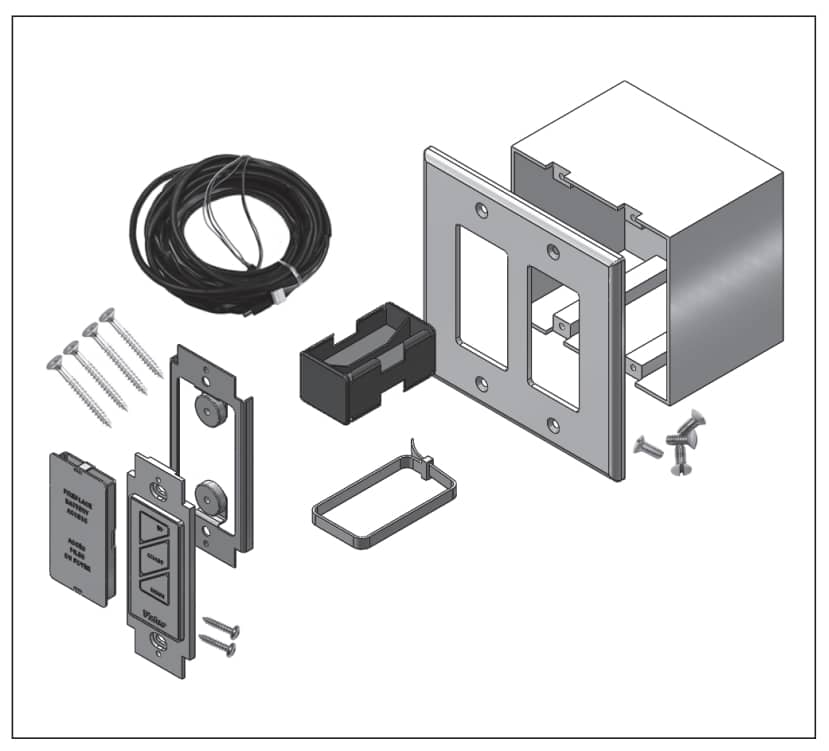
Contents of the RBWSK Kit
- 1 Wall Switch
- 4 Screws
- 1 Battery Holder
- 1 Plate with magnets
- 1 Battery Cover assembly
- 1 Harness assembly - 35 ft
- 1 Junction Box
- 1 Cover plate and Screws
- 1 Cable tie
How to Install the RBWSK Gas Fireplace Wall Switch Kit
Start by locating the receiver in the appliance’s case. If necessary, refer to the appliance’s installation manual.
- Initially, pull out the receiver from its location to connect the battery holder and wall switch.
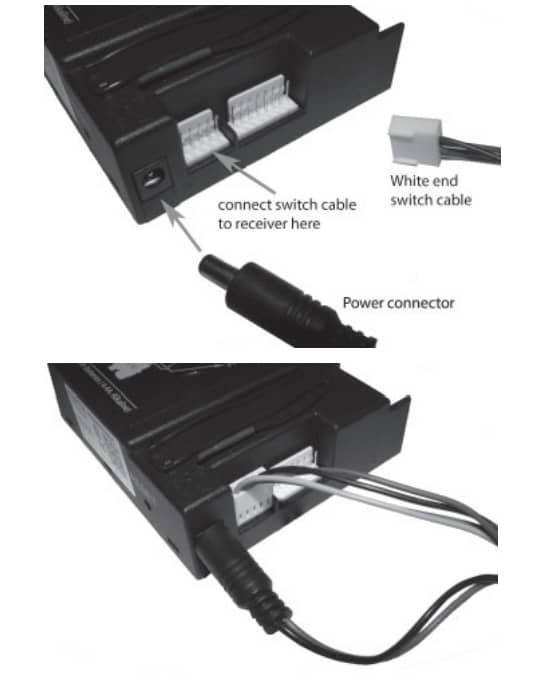
- Subsequently, feed the ‘white connector end’ of the harness assembly through side holes in the fireplace liner body to the receiver. Make sure to ensure sufficient harness length to allow for the removal of the receiver. Coil up any extra harness at the fireplace end.
- After that, connect the switch to the auxiliary 5-pin junction and power connection to the jack.
- Next, run the harness assembly to the mounted position of the junction box, securing the harness to framing using insulated staples (not included).
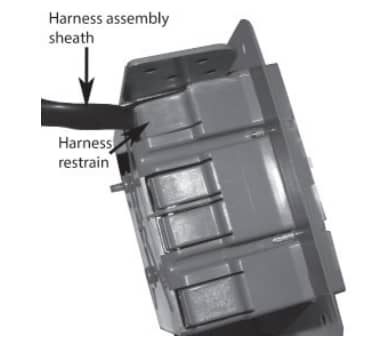
- Then, feed the harness assembly through a restrain on the rear of the junction box, feeding through until the harness sheath is pinched by retainer and providing sufficient length to make a connection to the rear of the switch and battery holder.
- Following this, secure the junction box to the mounting surface using appropriate fasteners (not included).
- Afterwards, align the Molex connection on the switch cable of the harness assembly and connect to the switch.
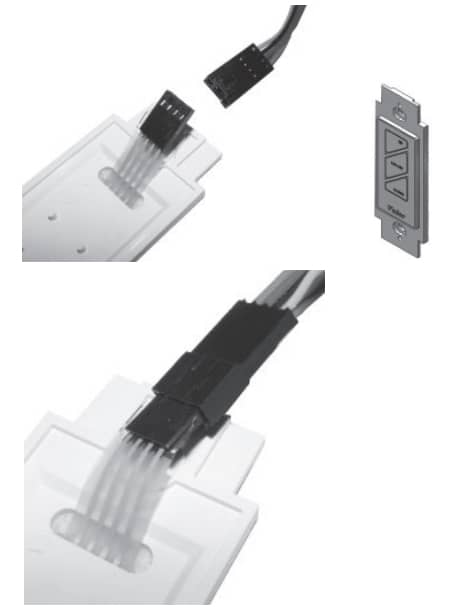
- Subsequently, mount the switch plate to the junction box with 2 screws provided. Decide on the switch position, left or right, to suit the homeowner's wishes.
.jpg)
- Then, locate and secure the magnet plate using the 2 long screws provided.
.jpg)
- Next up, place and secure the cover plate to the box using 4 screws provided.
.jpg)
- Following this, feed a cable tie through the 2 side slots of the battery cover assembly.
- Position the battery holder to the rear face and secure it together with a cable tie. Remember to note the clearance required for battery snap connection.
.jpg)
- Make the snap connection, load 4 new alkaline AA battery into the holder (included with fireplace) then feed back into the junction box assembly.
.jpg)
- Test the wall swatch to ensure functionality.
Additional Resources
To learn more about the wall switches listed above, please refer to the PDF manuals by clicking below.
In Conclusion, both the 1265WSK and RBWSK models offer comprehensive solutions for those looking to enhance their fireplace experience. By following the detailed guidelines provided, users can ensure optimal functionality and safety. Always remember to consult professionals when in doubt and regularly maintain your fireplace systems for longevity and efficiency.
For a broader understanding of gas fireplaces explore our Ultimate Guide to Gas Fireplaces.
Didn't find what you need? Return to our Fireplace Blog to learn more.
Table of Contents